Managing Database Using phpMyAdmin
phpMyAdmin is a web-based tool for administering MariaDB and MySQL. This article describes how you can manage your database using phpMyAdmin in the Control Panel.
1. Locate your target deployment
Log in to the Control Panel and locate your target deployment on the Home page or the My Applications page.
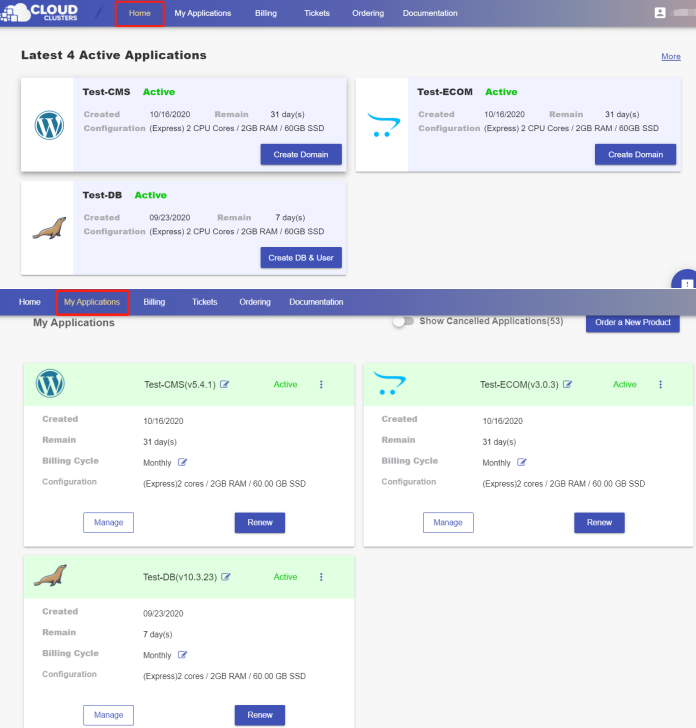
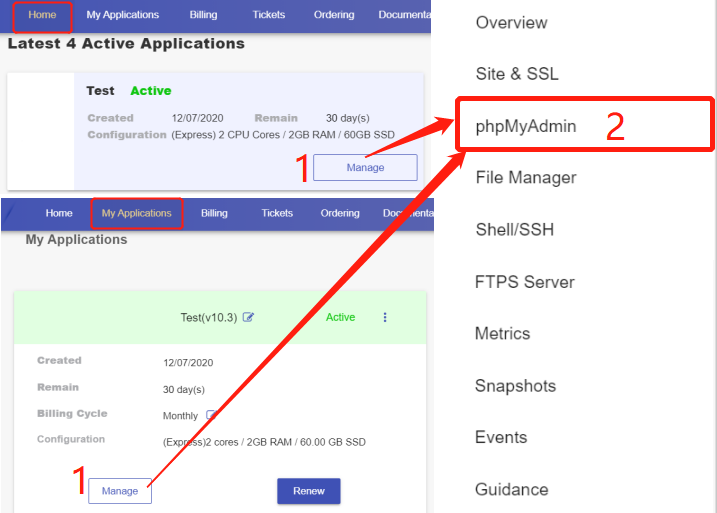
2. Navigate to the “phpMyAdmin” page
Click the "Manage" button on the Home page or the My Applications page to go to the phpMyAdmin page.
3. Access phpMyAdmin
Click “Launch” to go to the login interface of phpMyAdmin.
Note: Please do go to phpMyAdmin through the Launch button in our control panel as it brings unique information that required by the login. That being said, going directly to the login url will cause login failure.

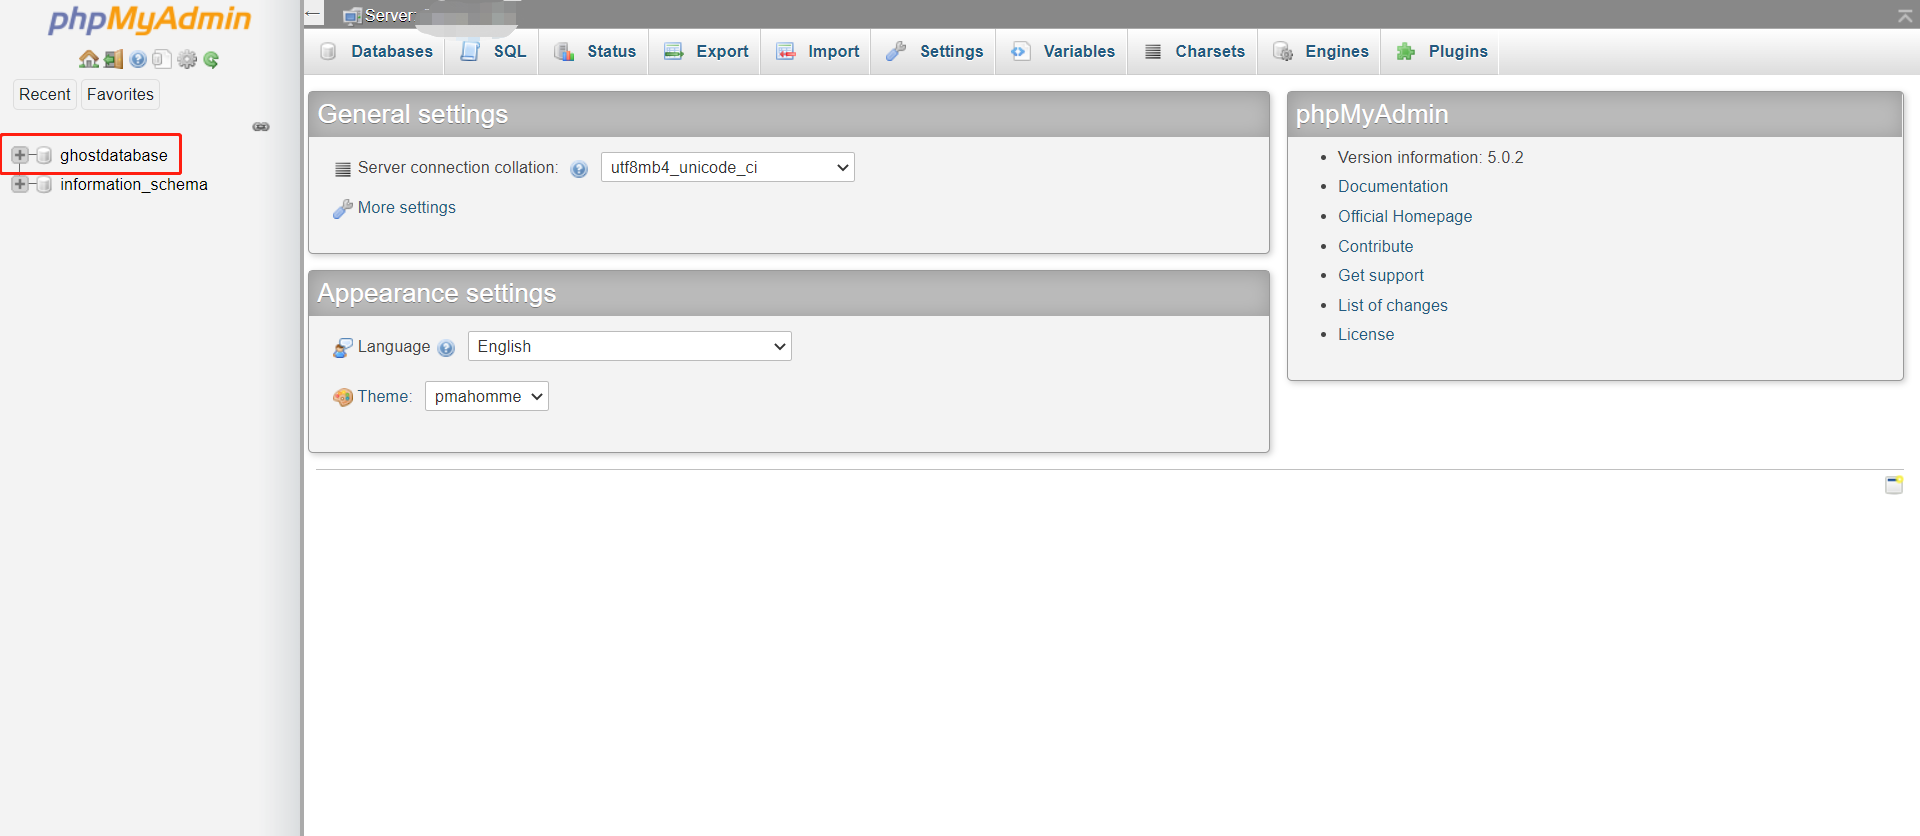
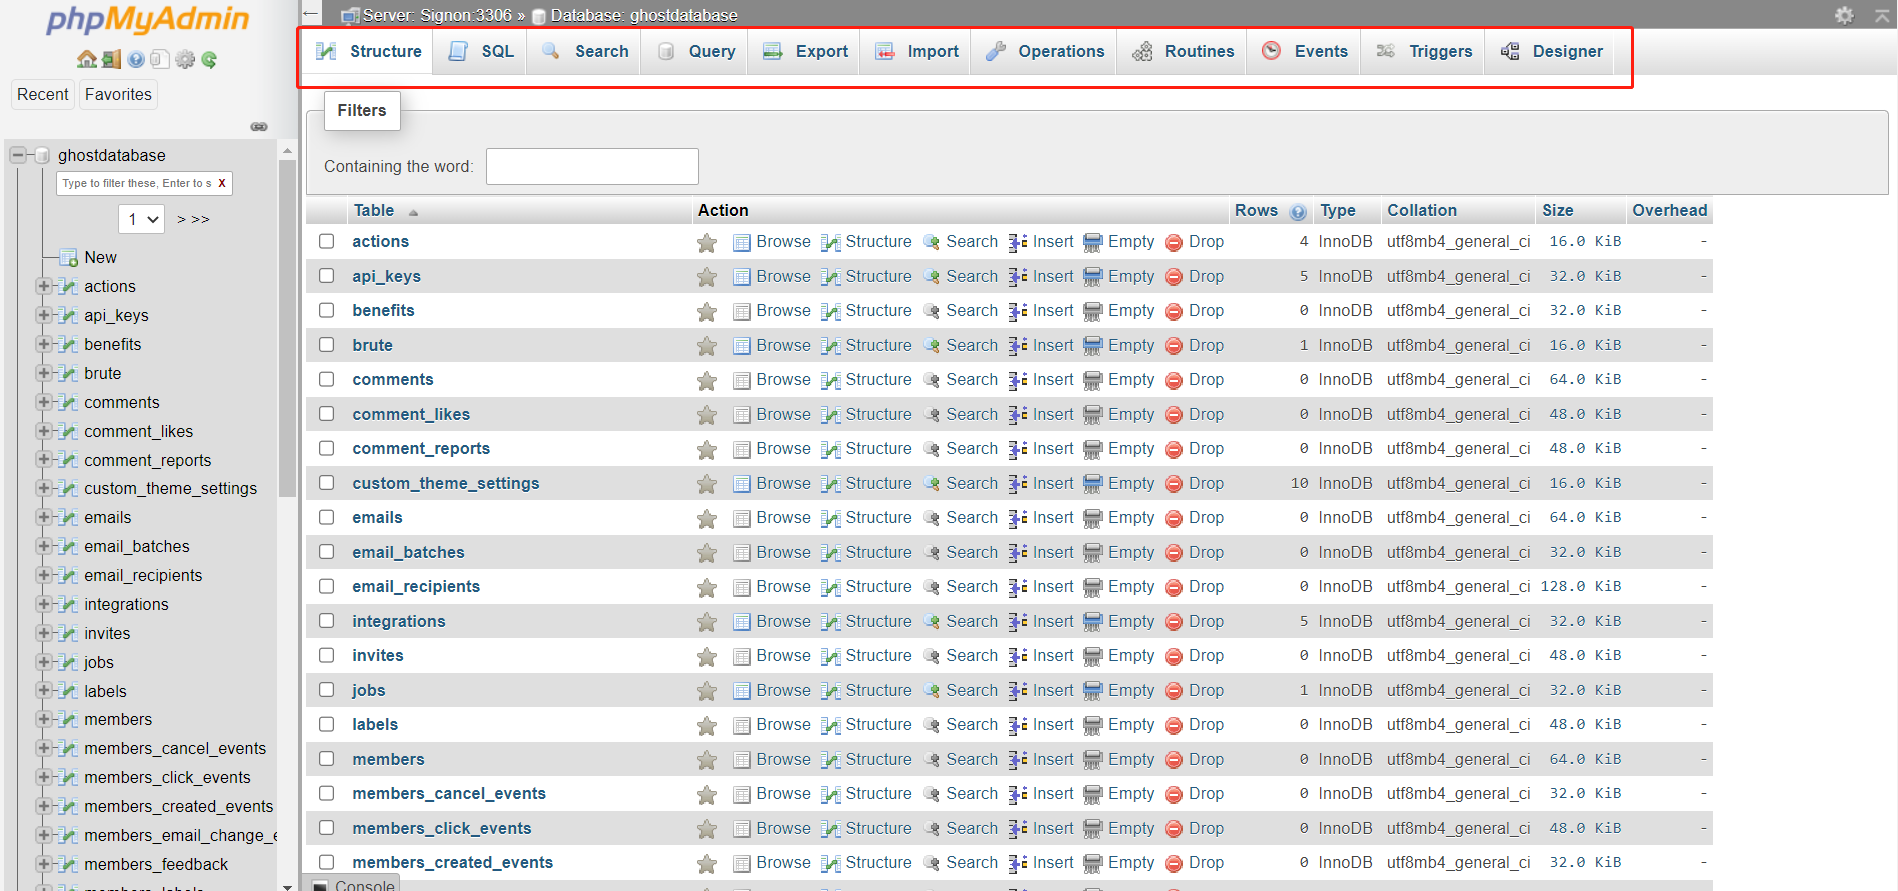
On the phpMyAdmin interface, you will see the database of your Ghost on the left panel. Click on the database you want to manage.
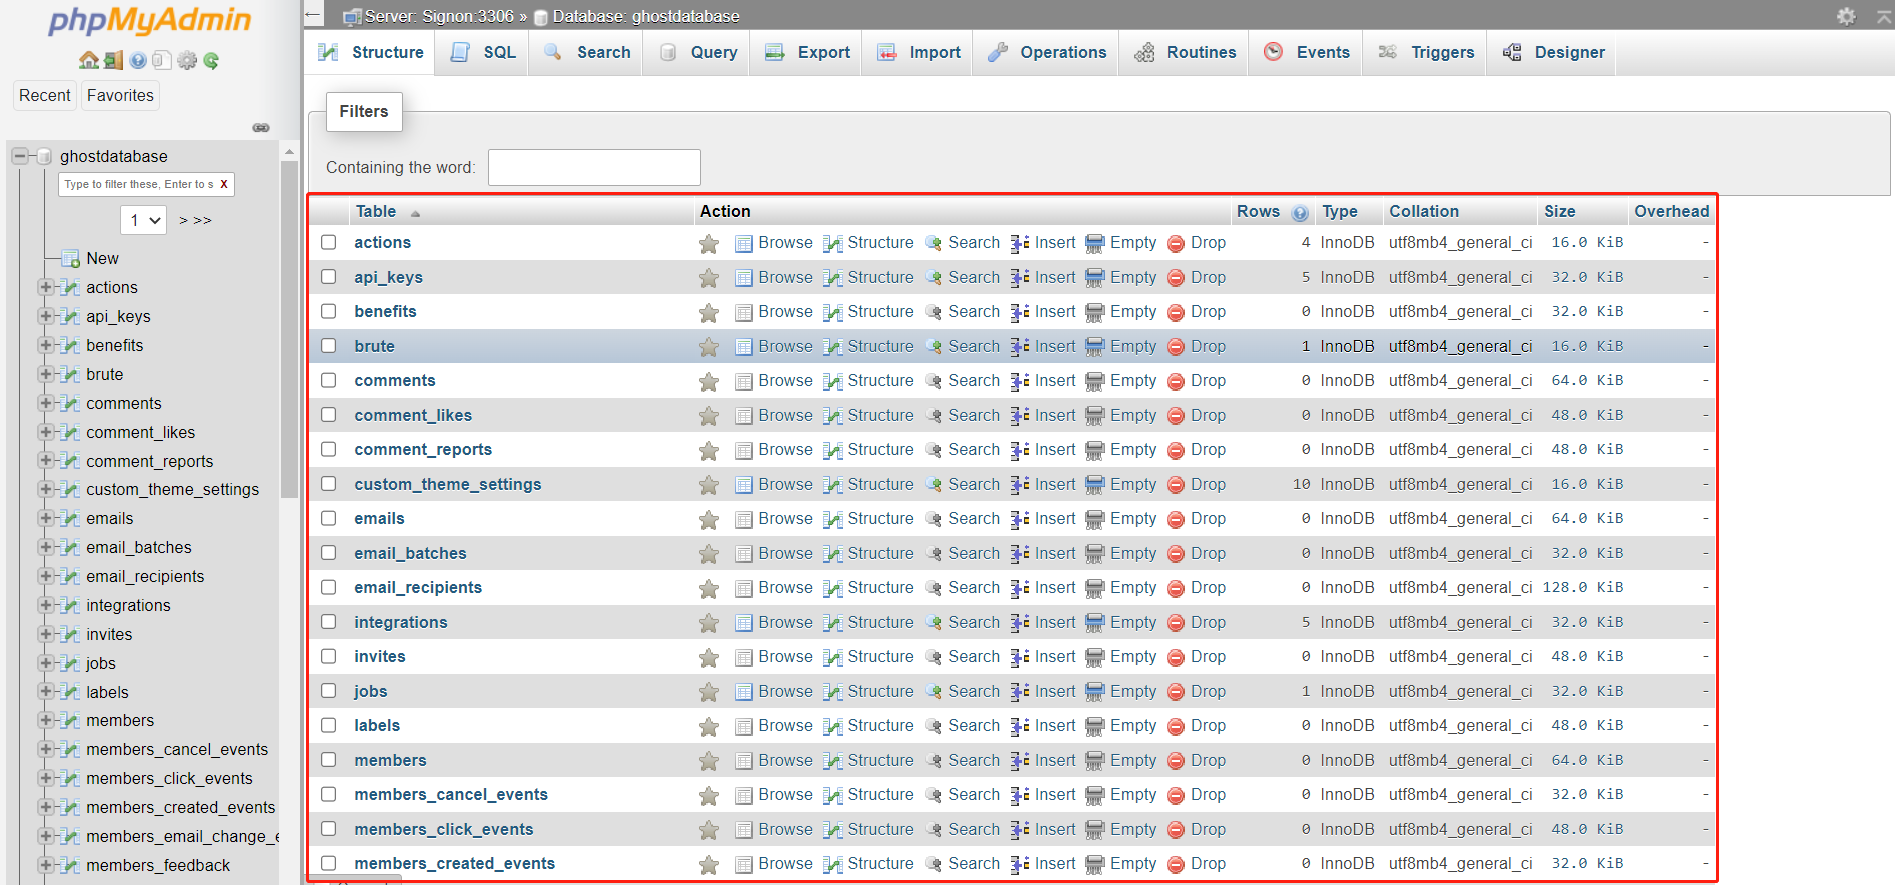
On this new page, you will see a list of the database tables, the allowed actions with them, the number of the records, the storage engine, the collation,etc.
4. Perform Common Functions in phpMyAdmin
From the top menu bar, you’ll see various options for the database you’re working with, such as: Structure, SQL, Search, Query, Export, Import, Operations, Privileges, Routines, etc.
Note: when you import files using phpMyAdmin, the file size can not excess 100M.